Use this guide to change what your Standard AD descriptions say before they become a video. In Standard AD the video never pauses: each description plays in a quiet moment between the dialogue, so timing and length matter. You edit the wording and timing, then render and download. Changing the text is free. Working with Extended AD? See How to Edit Extended AD.
1. Ask for the script first
Set up the generation the usual way, as in How to Generate AD for Your Video: add your videos, choose AD Audio or AD Video, pick Standard AD, then the language, the voice, and any custom instructions.
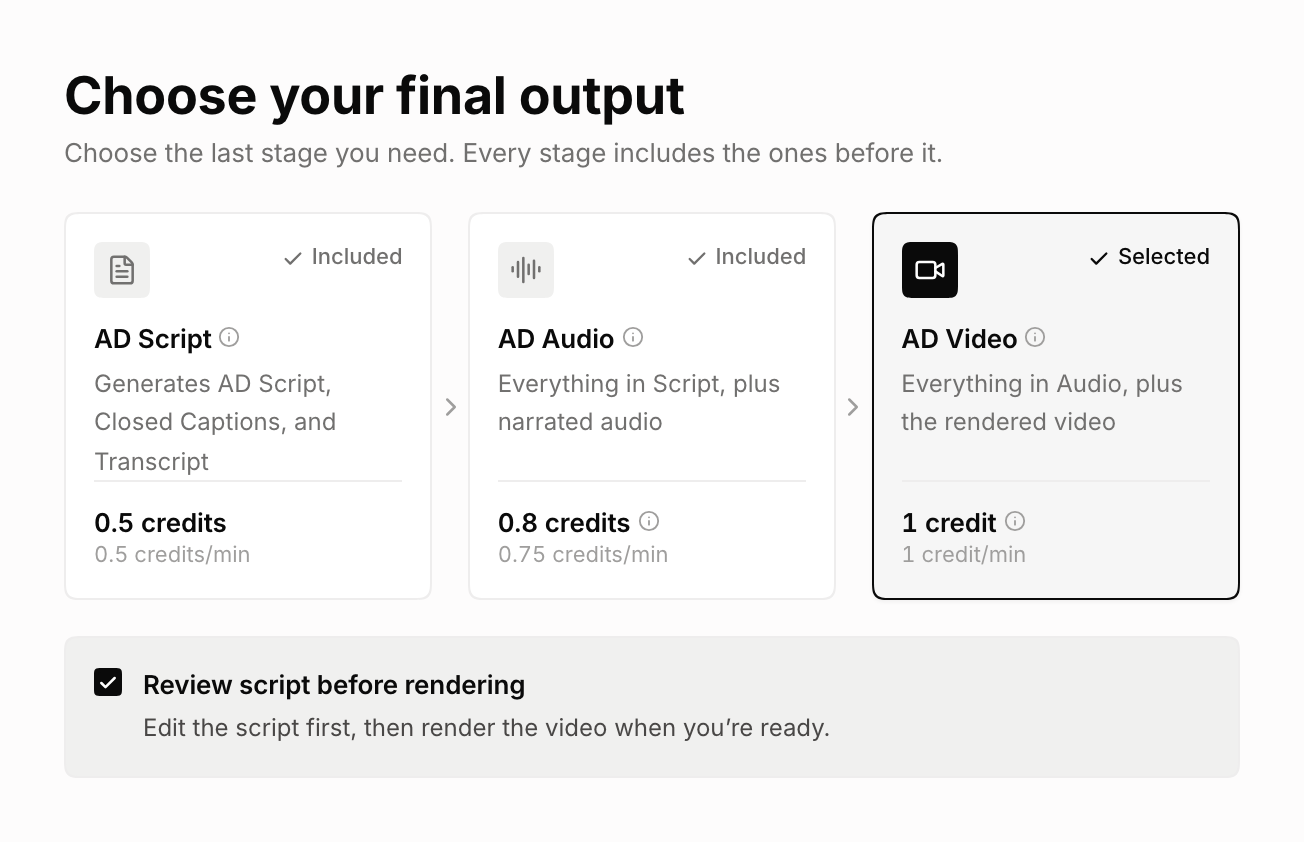
Below the output cards, above Settings, check Review script before rendering. For AD Audio, check Review script before creating audio. Keep your final output selected; you do not need to switch to AD Script. Then click Generate.
ViddyScribe prepares the script and waits for your review. The total price stays the same. Your selected voice is included; AD Video also includes its first render.
2. Open the editor
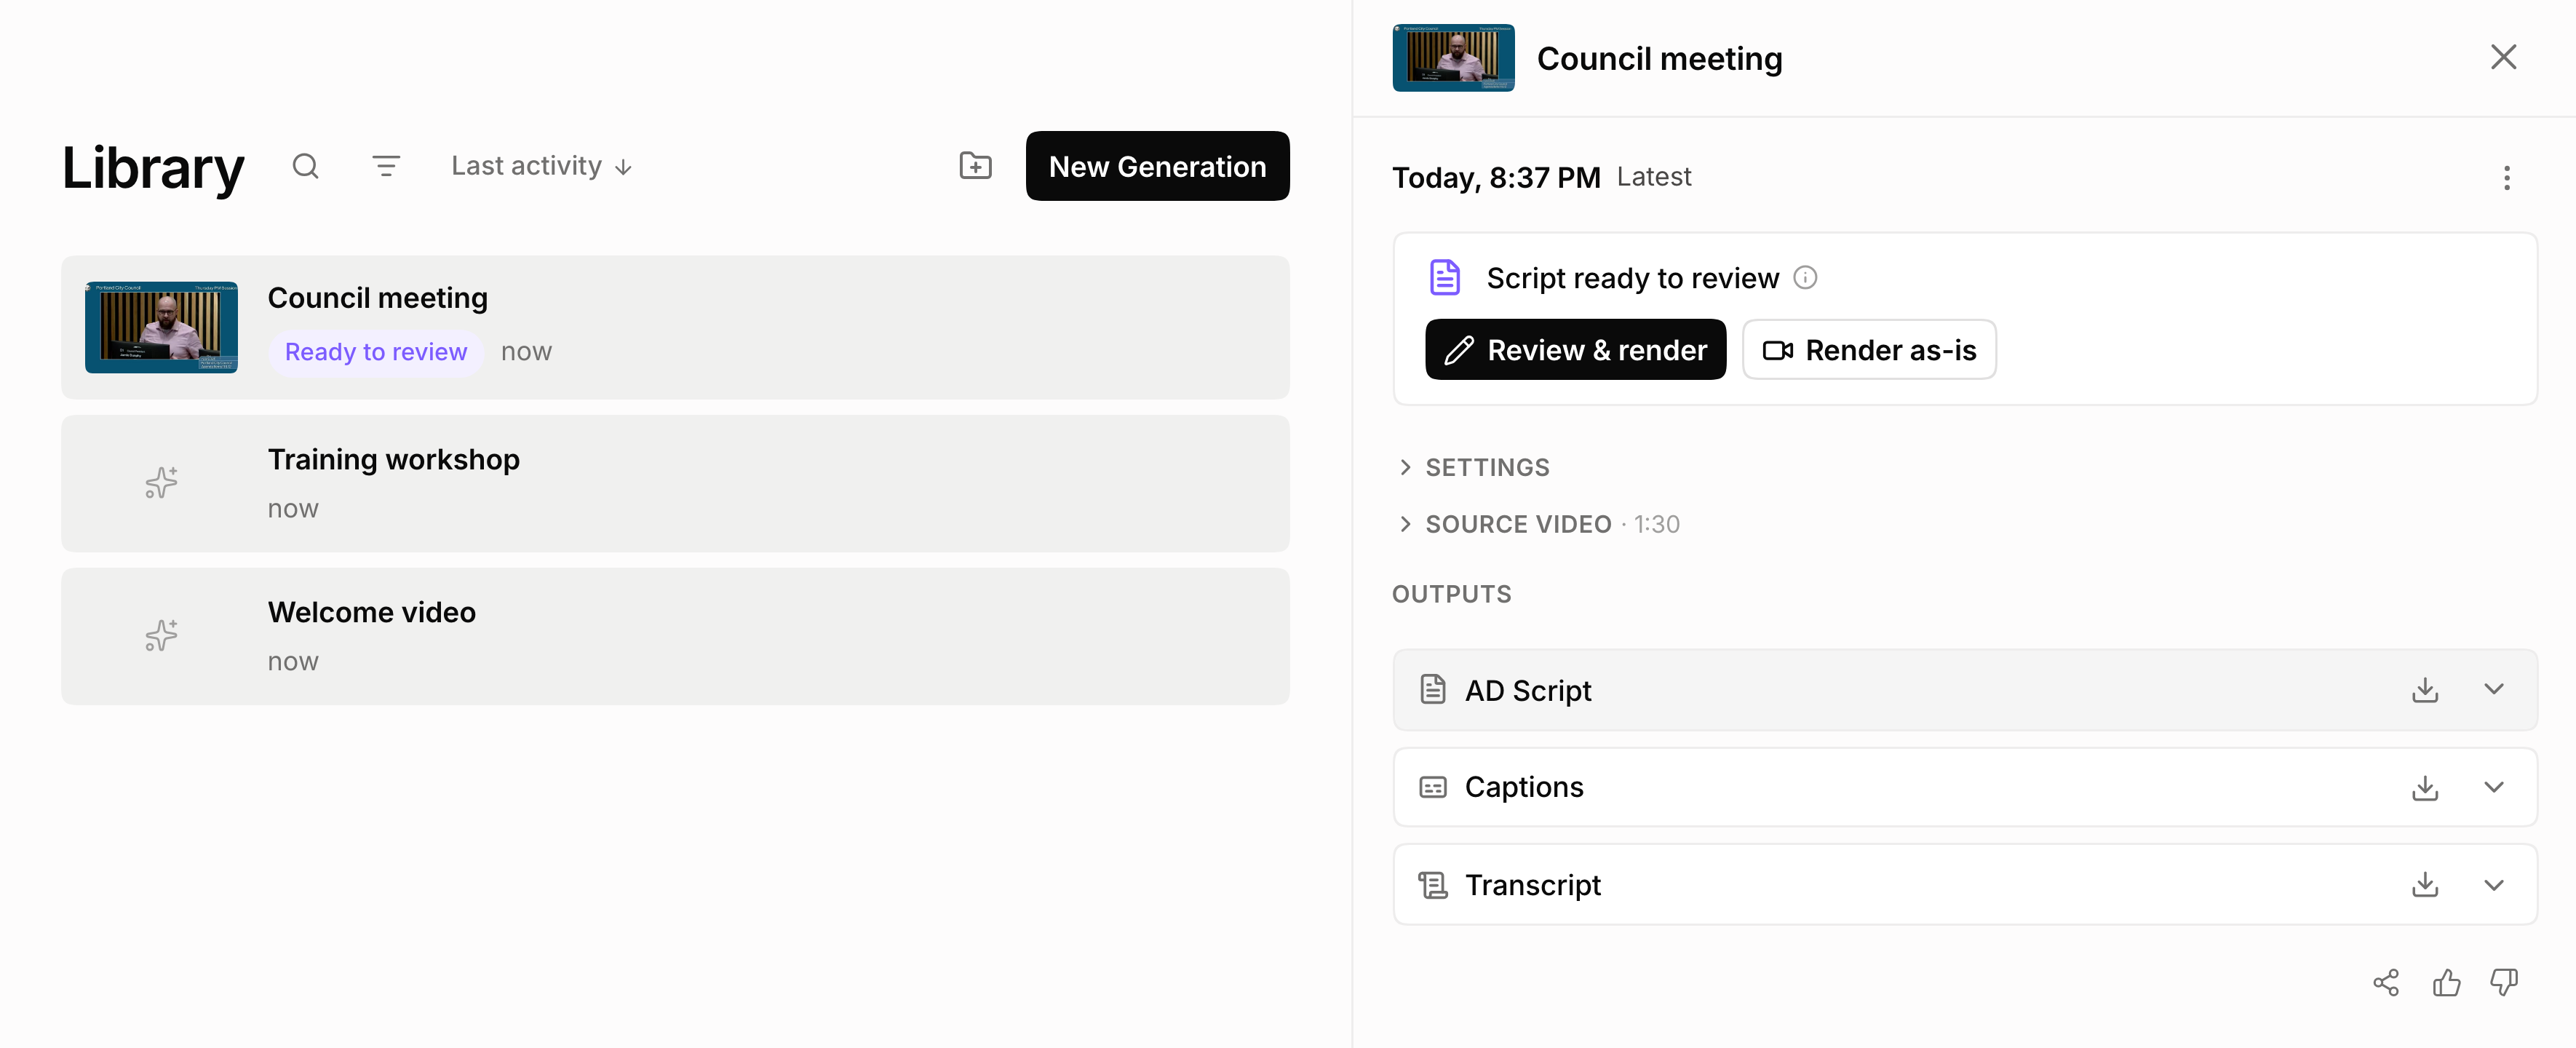
When the script is ready, the video in your Library shows Review & render (or Review script for AD Audio). Click it to open the editor. The editor needs a computer or tablet, not a phone. For a video you have already finished, open it and click Edit instead.
Happy with the script as it is? Click Render as-is (or Export audio) on the same card to skip the editor and use the script as generated.
3. Edit the descriptions
Keep them clear of the dialogue
The video plays on the left, your descriptions are on the right, and the timeline runs along the bottom. Click a description to change its words; your draft saves as you type. To remove one, click the trash icon, and Undo brings it back. Turn on Dialogue to see where people are speaking: those are the parts to keep clear. To move a description, drag its marker along the timeline.
Each description lasts as long as it takes to say, so a long one can run into the next. When that happens, the editor shows how far it runs over. Click Auto-fit, and AI shortens it just enough to fit. To add a description, move the playhead to a quiet moment and click Add description, then type it yourself or click Generate with AI. Edit captions the same way in the Captions tab.
Let AI write it
Select a description and click Edit with AI. Use Reword when only the wording needs to change, like making it shorter or more neutral. Use Edit from video when the change needs visual information: it watches that moment of the video, so it can fix details or read on-screen text word for word. Accept the result, or try again. To make the same change everywhere, use Reword all: Fit to gap shortens only the descriptions that run too long, or type your own instruction and every description updates at once.
Hear how it sounds
To check your work, play the video. Your descriptions play over it in your AI voice, just like in the final video. Anything you have just changed is read by a free robotic voice, which is enough for judging the timing and the words; click Generate speech to hear it in your AI voice. If a name is said wrong, right-click the word, choose Change pronunciation, and type how it should sound. Only the voice changes; your written description stays the same.
To try a different voice, open the voice menu and click Use this voice. The voice you picked when you generated is included, so that costs nothing. A different voice costs 0.25 credits per minute of video, and the editor shows the price before you confirm.
Your team can work on the same draft: you see who else is in it at the top, and a teammate's name shows while they type. To keep a copy you can come back to, click Save version and give it a name. Saved versions live in the Draft menu, where you can open one or restore it.
4. Render
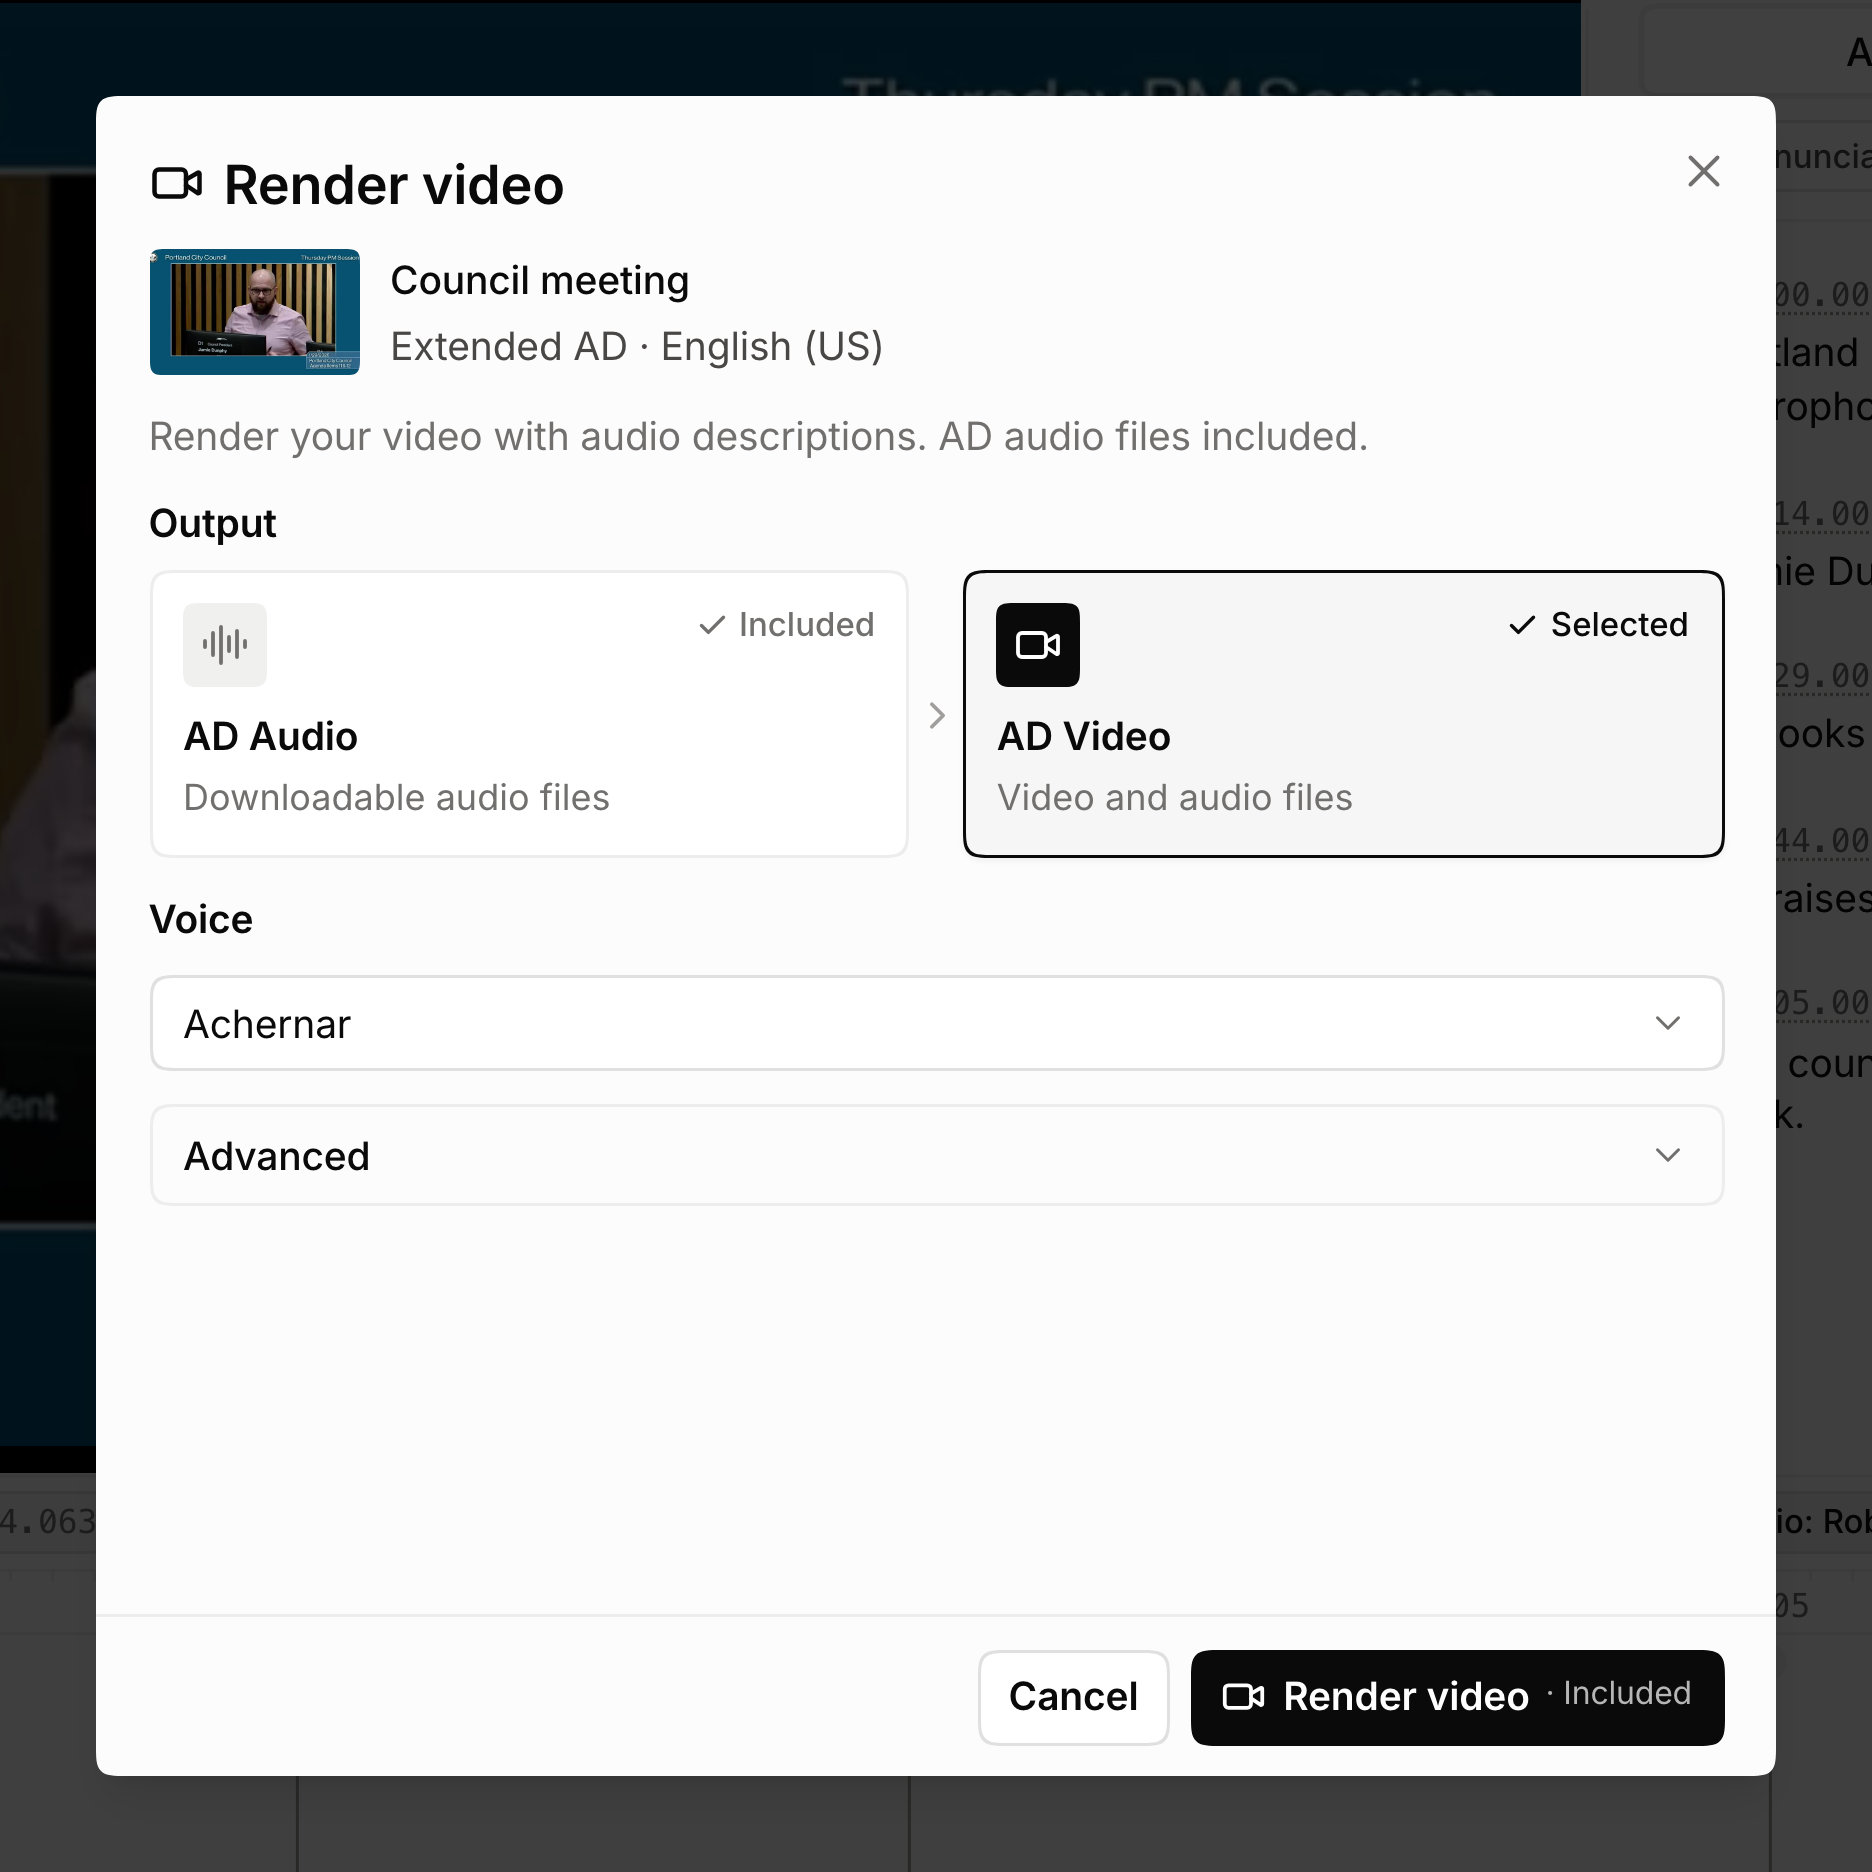
When you are happy with your edits, click Render. Choose AD Video to render your video with audio descriptions (AD audio files included), or AD Audio to get just the audio files. If some descriptions still run long, turn on Auto-fit under Advanced. You go back to your Library while it renders.
5. Export and download
When it is ready, download the AD Video: the descriptions are mixed into its soundtrack, ready to share. Click Export to pick the files you need: output video, AD audio, AD script, captions, or transcript. You can also download from your Library, or select several videos there and click Download.
Not sure which file to use? See the FAQ in How to Generate AD for Your Video.
FAQ
Can I review and edit the descriptions before generating the final audio or video?
Make Your Videos Accessible in Seconds
98 languages · Standard & Extended AD · VTT, audio, and video