

ViddyScribe's AI engine creates excellent audio descriptions right out of the box. But sometimes, you need absolute control over the phrasing, timing, or length of a description to meet specific accessibility standards or artistic intent.
ViddyScribe Enterprise provides powerful tools for refining your content. In this tutorial, we'll explore how to use the Edit Tab, specifically the Timeline Editor and the AI-powered Smart Edit feature.
Step 1: Accessing the Edit Tab
After ViddyScribe has finished generating descriptions for your video (whether you chose the Auto or Text Only workflow):
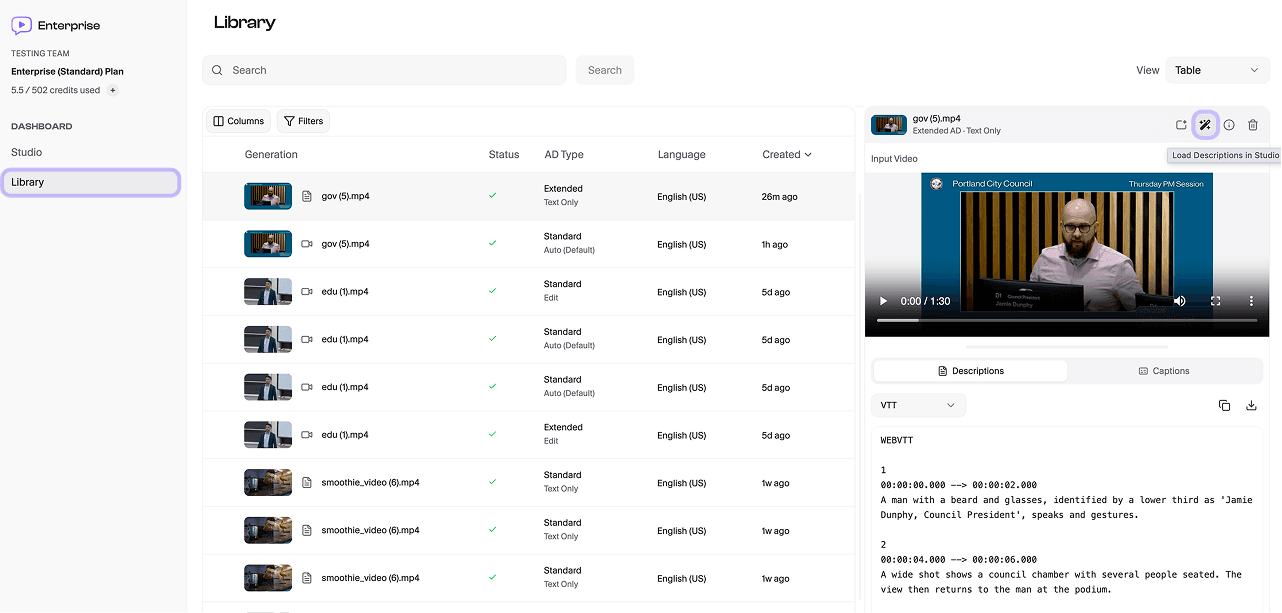
- Go to the Library section of your dashboard.
- Click on the video you want to review.
- Select the Magic Wand icon to open the Edit tab of the Studio workspace, where you can see all generated descriptions alongside the video preview.
Step 2: Editing the Text
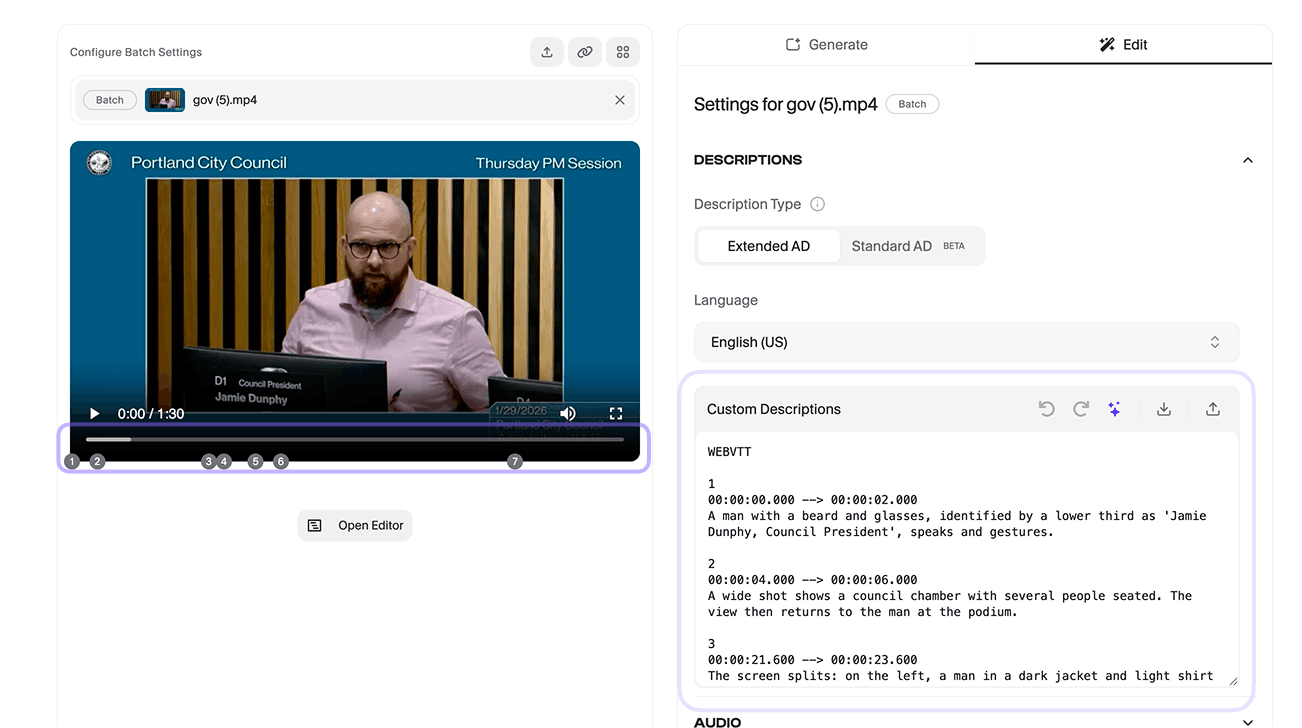
Need to change a word, rephrase a sentence, or adjust descriptions from a generation?
- In the Edit tab, you'll see a list of all descriptions.
- Click on the text of any description to modify it manually.
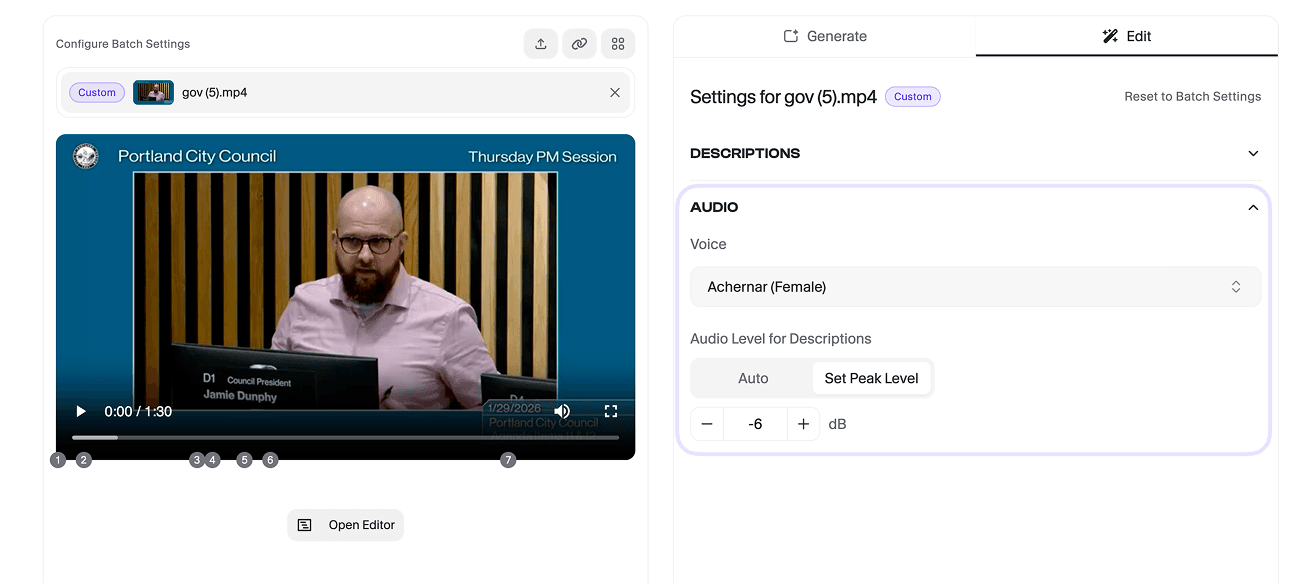
- Select your preferred voice and peaking level here before generating the final audio.
- The TTS engine will automatically update to reflect your new text.
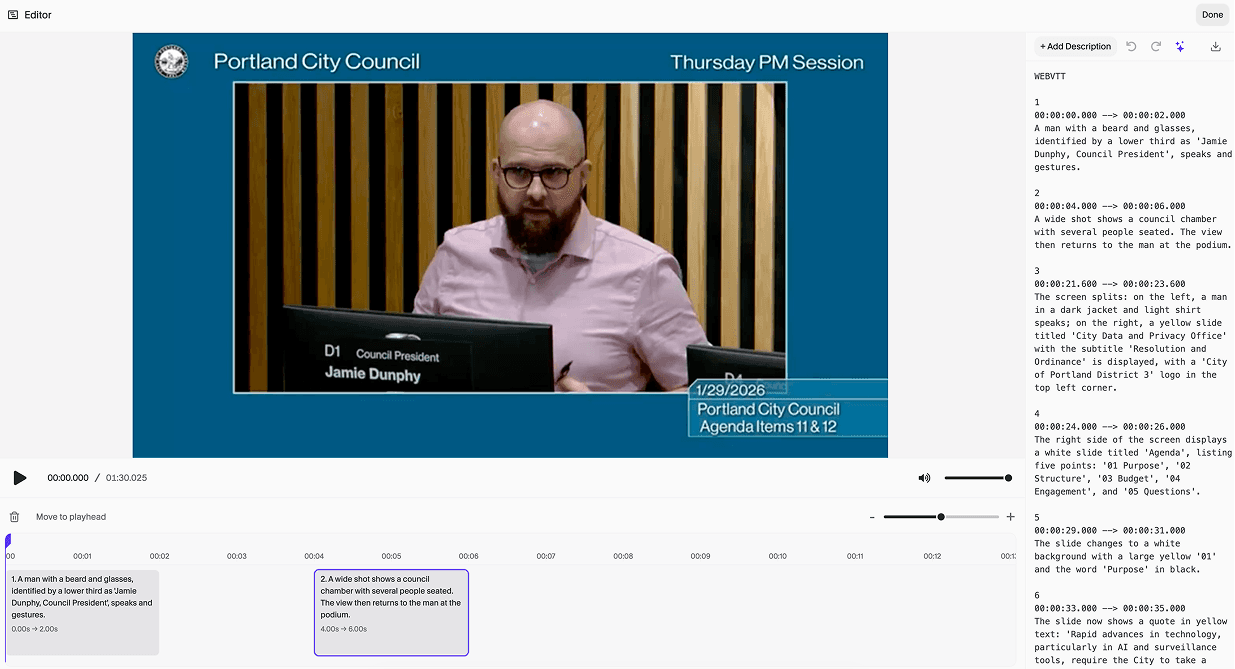
Step 3: Using the Timeline Editor
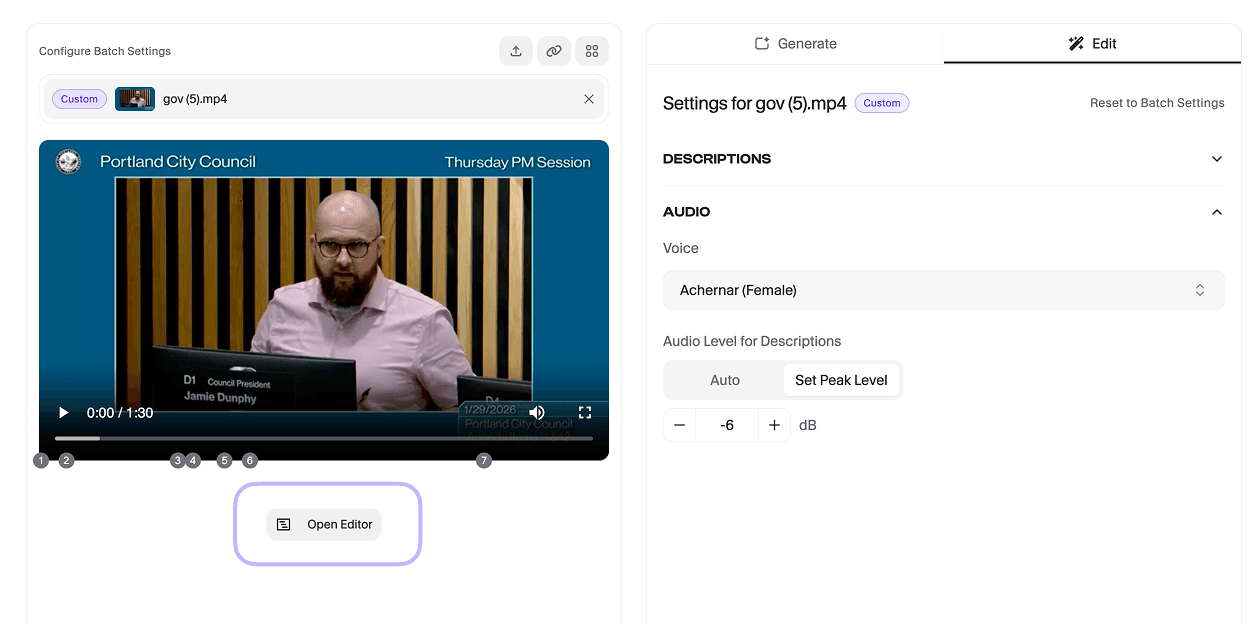
The Timeline Editor is a visual, drag-and-drop interface that makes it easy to adjust exactly when a description plays.
- Moving a Description: Simply click and drag a description block along the timeline to change its start time.
- Move to Playhead: Select a description block by clicking on it and click the Move to Playhead button to move the description to the same position as the playhead.
- Add New Descriptions: Use the Add New Description button to insert a new description manually at the playhead's position.
- Zoom In and Out: Use the Zoom controls to get a more complete look at your timeline, or to zero in on the exact frame you want your description to occur.
Step 4: Using AI-Powered Smart Edit
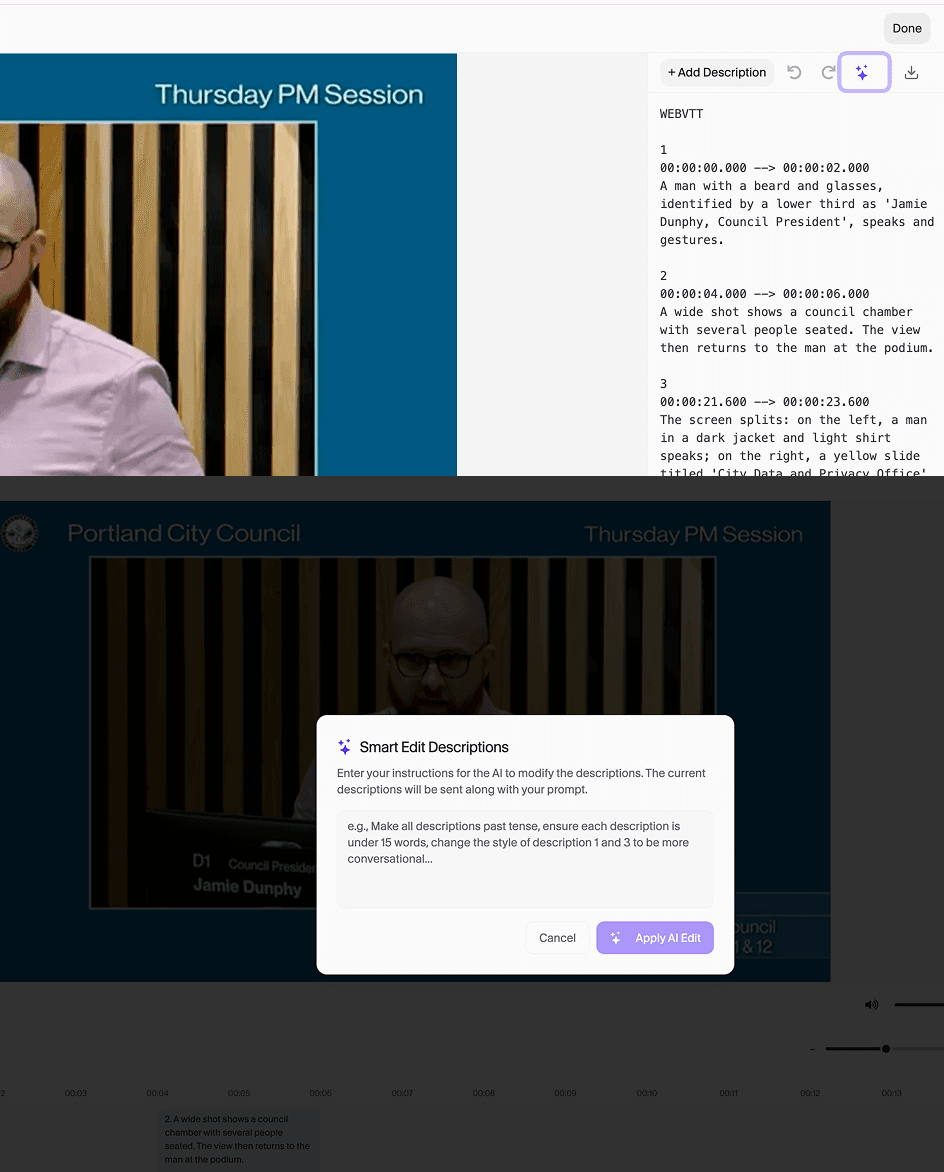
Smart Edit is a powerful feature that lets you use natural language to modify your descriptions, saving you time and effort.
- In the Edit tab, open the Smart Edit input field by clicking the magic wand icon.
- Type a natural language instruction. For example:
- "Shorten all descriptions to 8 words or less."
- "Make all of the descriptions more impactful and punchier."
- "Change all references to 'the man' to 'John'."
- "Translate all descriptions to Spanish."
- "Move all timestamps forward by 2 seconds."
- Click Apply AI Edit.
ViddyScribe's AI will interpret your instructions, adjust the text or timestamps accordingly, and present the changes for your review, saving you minutes to hours in your revision process.
Step 5: Generate Edited Video
Once you are satisfied with your edits:
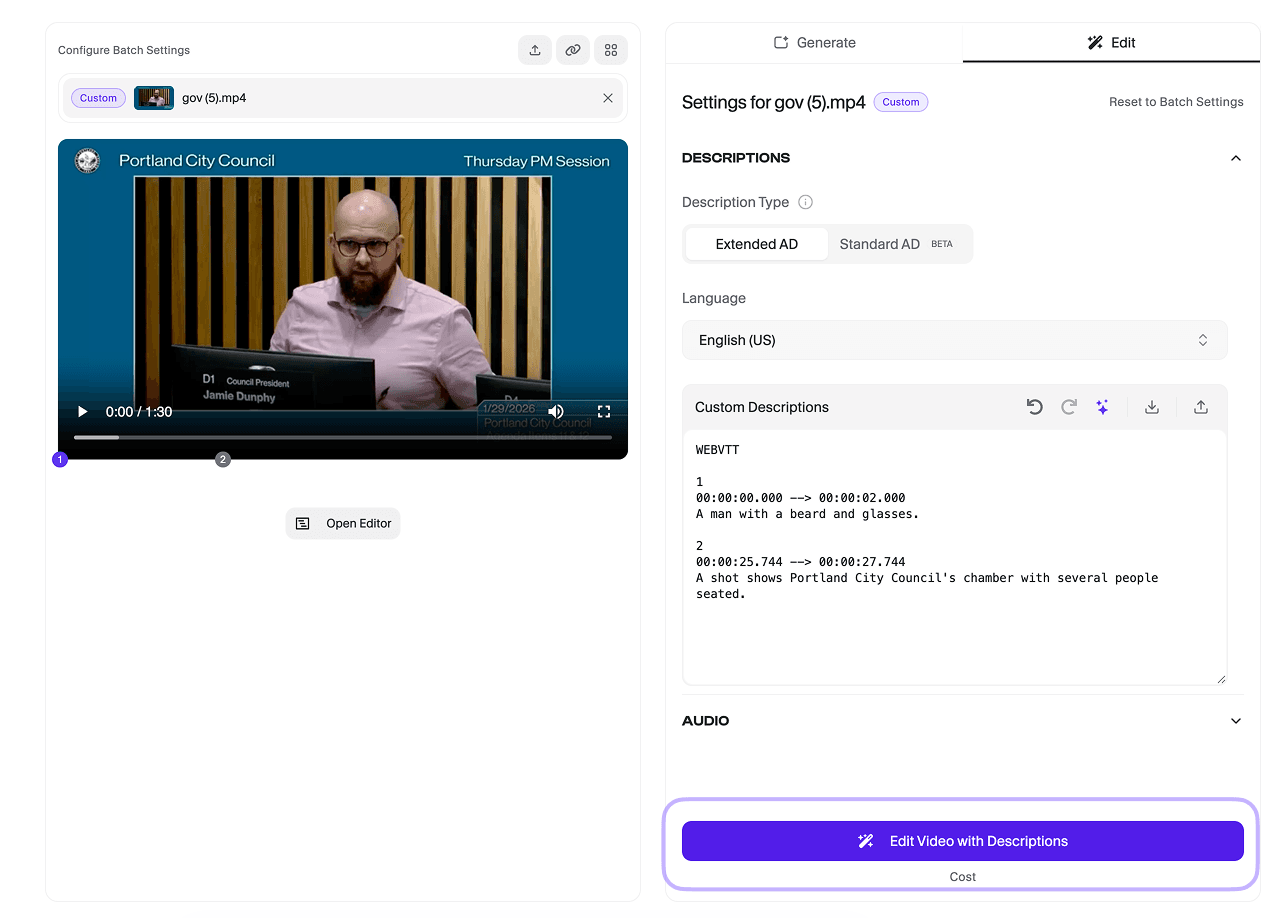
- Click Edit Video with Descriptions to finalize the video with your selected voice and peaking level.
- You can then proceed to the Library to download your final audio described video (MP4), audio track (WAV), or text file (VTT/TXT/JSON).
Ready to refine your own audio descriptions? Get started with ViddyScribe Enterprise.
Make Your Videos Accessible in Seconds
53 languages · Standard & Extended AD · VTT, audio, and video